Sunday, May 17, 2015

Post 10 (May 17)-Do hard things...it is incredibly rewarding.

Our tiny house has half a roof.  A tiny roof for a tiny house, I suppose :)

So...remember how our very first blog post was titled "This is gonna be fun"?  The karmic gods must have thought we needed to be brought back down to earth so they threw a few (figurative) wrenches in the works.  The wrenches took the form of:


  • two broken hammers
  • a faulty nail-gun
  • wind
  • a torn tarp
  • feeling "hangry" mid-afternoon
  • decreased visibility (because of awesome progress) that made effective communication nearly impossible
  • sunburns
  • chills
  • and last, but certainly not least, glue that spackles the entire interior (along with hair, paints, shoes, the dog, and favorite shirts) when hit with the nail-gun.
We woke up joyfully this morning, jumped out of bed and thought, "Another day to work on the tiny house together!"  Little did we know, the karmic gods were already chuckling.

In spite of it all, we had a very productive day.  We built an outrigger for the front of the house.  I will never look at building exteriors the same way again.  Everywhere I go, I see outriggers.  On Lowe's, on Safeway, on Costco, on...wow, I haven't gone very many places recently.

We then put 1/2 inch plywood on the rafters, a process that closely mirrored that of sheathing the walls.  Glue, stick, and nail.  Glue, stick, and nail.  Glue, stick, and nail.  At this point in our build, I'm more thankful than ever that we are building a tiny house.  Sheathing a full-size house would probably do me in.

It isn't always fun, but we are learning so much about diligence, resiliency, and patience.  And, while we might not be laughing the whole time, periodically we look over at each other, smile, and think to ourselves, "Wow."  It's a less feisty type of fun than I typically like to have, but a deep, contented satisfaction.  

So, it is very challenging indeed.  The most involved project we've ever undertaken.  It's also the most rewarding.
___________________

Have you watched the show Tiny House Nation?  The carpenter, Zack Griffin, is an absolute genius, and the other lead on the show, John Weisbarth, helps people downsize like its his job.  I mean, it is...  Anyways, Kacey and I were catching up on back episodes and happened to see a couple in Pleasant Hill, California (where we live!!!!) as the featured couple on the show.  Their tiny house is so beautiful and we were so excited to know that there were kindred spirits in our neighborhood.  Their blog, Tiny House Basics, has already answered some of our pressing questions.  Thank you so much, Shelley and Josh!
___________________

Two weeks ago, on Kacey's day off and our construction day together, we built all of the rafters for the main part of the house and the dormers.  See pictures below.  I didn't get around to a blog post after those couple of days of exciting progress, so I am including the pictures below.
___________________

On Kacey's day off, he very precisely cut the rafters.

Each rafter is attached to the house with a hurricane tie.  Not common (except in Florida), these help the roof stay attached to the house in the event of high winds and while driving down the highway.

Gus looking nervous in the loft!  No, he didn't get up there by himself.

House with all rafters in place.

We absolutely love this picture!  It's a view of the interior of the house while sitting in the loft.

Gable (the part away from the front of the house) and roofing.

The gable up close.
Did you know that the roofing does not butt up to the ridge beam?? There is a 3/4" air gap so that the house can ventilate.
A view from the top.  You can see the space between the ridge beam and the roofing.  You can also see the Simpson Strong Ties that connect the rafters to the ridge beam.  This house is really strong. 
A view of the inside standing at the front door.  We still have to put roofing on the dormer and cut out the windows on the right (passenger) side.


Monday, April 27, 2015

(Post 9) Apr. 27-Pride


Looking out the kitchen window is very rewarding!

After a few weeks of slow progress, this Sunday marked a very exciting day!  As you can see in the picture above, the loft is completely framed out (minus the sheathing on the end and far walls) and the peak in the front of the house is framed and standing.  Note the ridge beam that runs along the length of the center of the house--now THAT was some heavy lifting!

I'll take you through the steps to get here.  In order to start framing out the dormer, we had to complete the floor of the loft (ceiling of the downstairs bedroom/bathroom).  That entailed a trip to the hardware store, and choosing the finishes we wanted on the bottom of the tongue and groove boards (ceiling of the first floor) and the top of the boards (floor of the loft).

I was stunned.  We'd been working on framing the house for so long that I never thought I'd have to make decisions about the interior!  I don't know what exactly I thought would happen, but...

Anyways, as you can see from the pictures below, we chose to stain the rafters and floor a natural color to expose the young pine and paint the ceiling a timeless white (no, seriously, that's the name of the paint we chose).  It was surprising to me how quickly we moved from exterior to interior work and it struck me that there really is not all that much that separates us from the great outdoors.  Somehow it seems like we humans work extremely hard to create divisions where they do not exist and focus on them when they are tenuous at best.  But I digress.

Once we had the loft floors done, it was time to get to framing!
The back of the dormer and the peak at the front of the house framed and on top of the flooring.

 A shot of the floor of the loft.  The hole is where the staircase meets the loft.

The ridge beam is up!  If you're new to ridge beams, they are extremely heavy! 

Not bad for a couple of kids from Denver, eh?!

The dormer walls framed out.

A shot from the backside of the dormer walls.  Take a look at how perfectly the angles all match up--way to go, Kacey!

A close-up on the framing for the loft.

A close-up of the peak at the front of the house.  If you're in a math class, the angle on top is a right angle, and we used Pythagorean's Theorem to figure out how long the hypotenuse had to be!

A view of the inside.  Now you can see the rafters and the white tongue and groove boards.

Layers upon layers.  


We are so so proud.  It's hard to believe that we did that.  It's hard to believe that it started out as a trailer and a dream.  We are so proud!


Friday, April 10, 2015

(Post 8) Apr. 10-Why We Decided to Go Tiny

A neighbor of ours in Monterey drew this over dinner
at a neighborhood bar--we treasure it. 


Many people have asked us why we are deciding to go tiny.  Before our build began, we spent countless hours working through our why and looking to pioneers of the tiny house movement for inspiration and direction.


OUR WHY
Pursue a life that offers freedom to experience the richness of our world; freedom to work for purpose rather than paychecks; and freedom to surround ourselves with only the things that truly matter.


HOW WE GOT HERE
Imagine that your house is on fire and you have 30 seconds to grab the three most important things. What three things would you carry with you into the future?

On a sleepy Sunday morning, we did the same exercise. Without conferring with each other, we each said, “Our dog, a leash, and the computer.*” There we were, surrounded by items that we’d worked for more than 10 years to acquire, in a rented house that takes at least a fifth of our annual income, realizing that we could leave it all behind and not miss it too much. *Ironically, my computer (one of the three things that would have made it into the tiny house), was stolen just before Christmas.  Don't worry, now Kacey and I have a better, faster, newer computer that is ours.

With that in mind, we decided to construct a life that more closely aligned with what was most meaningful in our lives: positive human interactions and the freedom to experience life more deeply.

In doing so, we are escaping debt and financial stress, the excessive and wasteful luxuries of our modern society, and the mistaking of extreme wealth for extreme success.


OUR  INSPIRATIONS

TINY: a story about living small
We got started with "TINY: a story about living small," a video on Netflix.  Christopher Smith and Merete Mueller constructed a tiny house in the open air near Kenosha Pass, one of Colorado's most striking backdrops, and one in which Kacey has spent many summers.

Kacey got hooked first.  I came home from school one day and he said, "Don't laugh, but I know what I want to do with my life."  I immediately thought, "Oh, no, he's throwing in the towel, abandoning his career, and pursuing a career as...I don't know...a conspiracy theorist?"  I sat down next to him on the couch and saw the title of the movie, "TINY."  I laughed out loud.  For those of you that haven't met him in person, Kacey is 6'4''.  And he wanted to build and live in a tiny house. HA!

The joke was on me, though, because a few minutes in, I, too, was hooked.


Their dog, Salies, is much more photogenic than Gus.
TINY HOUSE giant journey
Jenna and Guillaume are tiny living pioneers who are currently a huge inspiration to us.  The two of them built their own tiny house and are now touring the continent, hosting open houses, and offering people a glimpse into the tiny lifestyle.  Kacey recently had the opportunity to meet them during their open house in San Francisco, and much to his chagrin, he found himself practically speechless.

Jenna's blog post "5 Lessons I've Learned from my Tiny House" was timely and inspiring.  After Kacey and I'd had a grueling day putting sheathing up (I am so glad we are building a tiny house--can you imagine how much sheathing there is for a full size house?!), this blog captured many of the reasons I am looking forward to living tiny, and it helped to re-focus and re-energize me.


Wednesday, April 8, 2015

(Post 7) Apr. 8 -Slowly but surely

The two of us standing in our front door.
All three future residents smiling at you from the kitchen.  We have one of the cutest dogs I've ever seen, but when we even try to take a picture of him, something terrible happens and the full extent of his cuteness is never captured. 
The next step in the process was to put sheathing around the outside of the wall framing.  In order to make the house very sturdy (in case we ever take it down a highway), we nailed and glued the sheathing to the 2x4s.  In talking with a friend of ours who is in construction, this is not a process that is typically used in more traditional builds.

One of the most wonderful things about putting the sheathing on was that it made our house so much stronger.  For experienced builders out there, I'm sure that sentence is like, "Yeah, lady, of course, that's why we do it."  But this being my first house and all... When we just had the framed walls up, the house rocked when I pushed it.  I thought, "How will it ever withstand even the slightest breeze?" Now, Kacey and I can both push on it and it doesn't budge.

It really is starting to look like a house.  Next, we frame out the roof.

In this picture, you can see the sheathing of the two long walls.  The rough openings for the windows have already been cut out of the side closest to the camera.  The sheathing of the short side had not yet been completed at the time of the picture, but it's been completed now :)

The sheathing around the opening for the front door.  We just placed the order for our double door :)

Another shot of the opening for the front door.  Oh, and Kacey's truck.

Tuesday, March 24, 2015

(Post 6) Mar. 24-Raise the ... Walls!

All FOUR walls up! If you squint, you can see the metal wrapping that goes around the four walls.  This Simpson Strong Tie strapping will keep the walls up when we are driving down the highway.

We learned a TON this week.  About tiny house construction, our own tolerance of learning curves, our need for visible progress, and how we support each other in this construction process.

Learning #1: Two sets of eyes are better than one.  Previously, Kacey has been looking at the plans, and I had helped in executing.  This weekend, we both consulted the plans, and then I participated in the planning and execution.  I don't know that I added all that much knowledge, but I did ask lots of questions, so it made us a bit more thoughtful.  For all you professional women out there, I "leaned in" to our tiny house construction :)

Learning #2:  We have the same low tolerance for learning curves--just in different areas.  While neither of us has ever built a house, Kacey is more familiar with power tools, home remodels, and consulting schematic plans than I am.  Since Kacey has some experience in this type of endeavor, he was half expecting that we would get everything right the first time.  When we had to measure, measure, measure and still make corrections, it was really easy to get frustrated.  We now know that in the same way we have to be patient with our construction, we have to be patient with ourselves since we are, after all, learning.

Learning #3: For weeks, we were framing out the walls on the bed of the trailer.  So... to the naked eye, it looked like we had made NO progress.  We started to despair.  As you can see, this Sunday we stood all of the walls up.  It took under ten minutes, but boy! did we feel accomplished!

Learning #4: This project is better done together.  There was a moment when we had to do some (ahem) sanding to get rid of 3/16 of an inch (refer back to aforementioned frustration with the learning curve).  We only have one belt sander, so I thought, "What a great opportunity to spend a bit of time getting dinner together!"  I went inside and after a few minutes was disappointed that I wasn't out there.  Kacey kept sanding and was disappointed that he was Han Solo.  Now we know--there might be one person sanding, but there are two of us on the team.  So we'll be out there together :)

If you're starting to think, "This blog is called 'Adventures of Cope-Beck: Tiny House Edition,' not 'Adventures of Cope-Beck: What we learned about ourselves and our relationship,'" you're right and I apologize.

Here's what we did this Sunday:
1. Stand the walls up.
2. Make sure they line up with the *&*^% all-thread rods.
3. Build the hole for the front door (french doors).
4. Put Simpson Strong Tie strapping around the house so that it doesn't fall apart going 25 mph down the highway.
5. Cover it in a tarp so that the floor does not get water-logged.

One down, three to go.  I mean, one UP, three to go.
Two up, two to go.
Three up, one to go.
Four up!
Close-up of the metal strapping.  
Kacey smiling at me from the living room window.  Notice the table saw in the front of the picture.  It's AWESOME.
Catherine smiling at Kacey from the living room window.  
All wrapped up!  Biggest piece of wrapping paper ever?!


Tuesday, March 17, 2015

(Post 5) Mar. 17-Better Late Than Never?

KP and Uncle Mike helping move the wall (!!) off of the trailer.  Check out why below.

After a flurry of blog posts, there was a two week delay--our apologies!  If you were anything like us, though, you needed a bit of a break.

I've had a sizable break and Kacey has rested for just one day.  For me, the past two weeks have consisted of trainings--participating in 'em and leading 'em, giving me no time to work on the tiny house since I was out of town.  All of the trainings were successful and I'm happy to be back with the boys (Kacey and Gus).

One of the things that Kacey and I are realizing is that with something so exciting happening at home, it is challenging to stay focused and present at work.  Yikes!  (Let the record show that I am working on this post over my lunch hour).  For all you SuperCamp folks out there, my 9-5 is a GREAT place to practice "This is it." I'm better than ever before.

Okay, enough chit-chat.  Since I've been out of pocket, Kacey has had 3 full days to continue our build.  In that time, he has framed out the two long walls that run along the sides of the trailer.  Slightly worrying that he is so productive without me, though he assures me it's purely coincidental.

Kacey also discovered that the plywood we put down at first was 1/4'' too thin.  Boohoo.  So, he had a few work friends (see above) help him move the walls off of the trailer bed so that he could put down yet another layer of subfloor.  At this point, the floor of our tiny house could withstand the Hulk doing jumping jacks.

Next steps include standing the walls up vertically and framing out the roof and dormer.  I'm really nervous for that part.

Any couple that's done a home remodel has probably experienced what I am about to describe.  Imagine that one half of the couple asks the other to make a decision about, say, the style of the windows (which, by the way, are SUPER expensive).  That half indicates his/her preference, to the slight dismay of the other half.  The preference for the style of window is different!  Have you experienced something like this?  How did you make your final decision?

If you're curious, Kacey and I have decided on windows with wood interior trim, red exterior trim, no grill, some kind of opening mechanism (TBD), and screens.*
*subject to change
Look at the very precise framing over the wheel hub.  Go Kacey!
The two large walls, one on top of the other.  Go Kacey!
Another view of the two walls.  Go Kacey!
No, you're not seeing things wrong, we (Kacey and a few buddies) had to take the wall off to add another layer of plywood.  Bring on the Hulk.

Sunday, March 1, 2015

(Post 4) Mar. 1-From The Window...


Looking at you from the spare bedroom!
Kacey not hitting his head - woohoo!

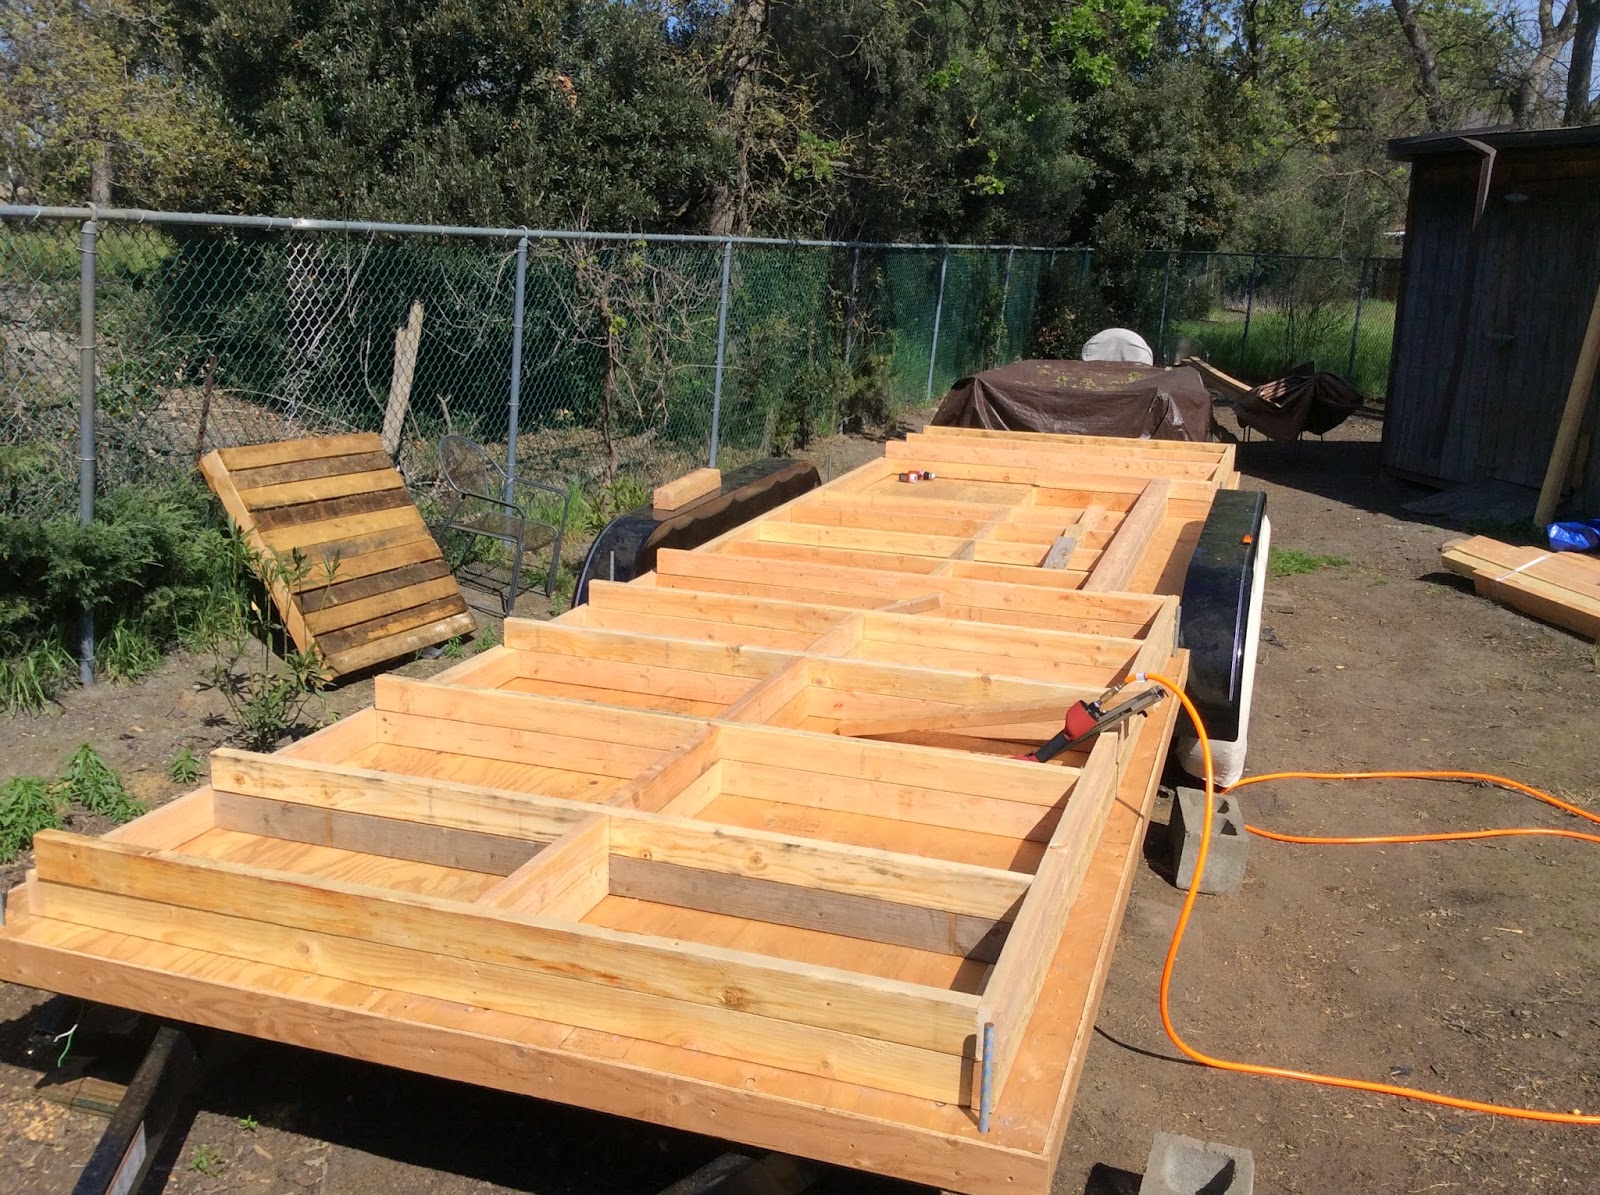
Today was a very exciting day--we finished putting the sub-floor on the trailer and then, as you can see from the pictures, framed out the first wall!

We started the day at about 8:00 and worked quickly as we got the rest of the sub-floor in.  If you picture a learning curve, we had already plateaued--we were sub-flooring experts!  Our egos grew slightly, but shrunk immediately when we realized that now it was time ... to ... build ... a ... wall.  With the sub-floor, you could literally cover up your mistakes.  I mean, do people even know that a sub-floor exists?!

We procrastinated a little bit (10:30 is lunch time, right?) and then checked and double-checked the plans and the instructional DVD.  Somewhat reluctantly, we walked back outside and carefully measured the 2x4 for the edge of the wall that runs along the front of the trailer.  The plans said that it would measure 88 inches.  It measured only 86.  So confident were we in our sub-flooring skills that we uttered something like, "You buy plans and you sort of hope they are actually accurate..."  Some karmic god somewhere no doubt started chuckling.

It was after we had the whole wall framed out flat on the trailer, not yet nailed together that Kacey (oh, thank God for Kacey!) thought to make sure that the all-thread rods would fit where they were supposed to.  They...did...not...

That's right, folks, we forgot one little step when building out the sub-floor.  It was a 1.5 inch mistake and was fixed in about 20 minutes.  We had to put 1/2 inch plywood around the edge of the 2x4s that were along the edge of the trailer.  So, basically, we've got a trailer wrapped in 2x4s wrapped in plywood.  Wrap that whole thing in bacon and you'd practically have a meal.

Anyways, we were quickly back on track, humbled, and steeled to finish the wall before sundown.  As you can see, we were successful!  After posing for pictures, we rested the wall back on the trailer.  Once all four walls are built, we will have a "Raise the Roof Walls" party!  Beer might be provided, but bring your own working gloves.

One more piece of sub-floor left.  
Gus and two bones.  Does he need two?!
The sub-floor's done!  
Beginning to frame out the wall.
Gus and me in the spare bedroom!