Sunday, May 1, 2016

Post 20 (April 28)-Butt Connectors

The front of our house, complete with trim around the tiny window, porch lights, and a mailbox that doubles as an illuminated license plate mount.

One of the challenging things about writing a blog is that I want to provide you with the most updated pictures and updates, but the moment I sit down to write the blog, inevitably the pictures are already outdated and we have more, really exciting things happening soon.  That very thought process, however, is what's kept me from writing a post for the past few months, and it's time to interrupt the thought train, and let you know about our progress!

Major Accomplishments:
  • Plumbing is complete--thanks Shane Letts! He even installed a very high-tech shower head for us (see picture below). Shane was able to retrofit a way to fill our 95 gallon on-board water tank using our city water hook-up and the easy operation of a couple ball-valves. He also had a great idea during early construction to use a water tank/system "dump" that is easily operated with a ball valve that can drain the entire system in case of contamination or freeze prevention, which he installed during the final wrap-up. 
  • Exterior siding is done (well, except for a tiny strip along the bottom.  In the picture above, you can see the tiny sliver of white house wrap that is still visible) See story below.* 
  • Batteries are installed in the battery tray that's nestled underneath the trailer and held together with unistrut.  Thanks to our neighbor Rich, we moved the tiny house back about 10 feet so that the tires sat on top of a mound of dirt, giving the three of us (Rich, Kacey, me) enough room to shimmy under the trailer and slide each of the 120 lb. batteries into the battery tray.
  • Electrical work will be completed next week.  Our electrician Zoran is an expert and we enjoy learning from him.  We have such confidence in his expertise and are so lucky to have found him.
  • Trailer lights are installed.  High priority because Kacey and I are going to show our tiny house at a Tumbleweed Tiny House workshop in Berkeley
  • Inverter is installed.  Special thanks to Jeremy C. at Wholesale Solar for his patience and expertise.
  • Mailbox, doubling as a license plate, is installed! 
*A Story About Our Exterior Siding: In Chinese literature, there's a story written by 胡適 called 差不多先生 (loosely translated "Mr. Good-Enough").  This story exposes the dangers of never doing a job to perfection.  Indeed, some of 差不多先生's last words are, "The living and the dead are just about the same." Philosophical reactions to this statement aside, 胡適 makes the point that living with a "good-enough" mentality is not likely to produce extraordinary results.  This tiny house project has opened our eyes to the areas in our lives in which we are "Mr. and Ms. Good-Enough," and the areas in which we are "Mr. and Ms. It's not good enough until it's perfect." Wonderfully (and frustratingly, at first), our areas of good-enough and never-good-enough don't really overlap.  Kacey is particular about every cut, the grain of every piece of wood, the location of every exterior screw.  I... am not.  When we first started our build, I found myself getting frustrated with his excruciating attention to detail.  I'm much smarter now.  As I look out at our tiny house from the kitchen sink of our big house, I'm so appreciative.  His attention to detail is creating a breathtaking masterpiece.

I'm that particular about different things--meals I prepare, in-person sessions I design, formatting of course materials, the tupperware drawer.  Just like me, Kacey found some of my "not-good-enough-until-it's-perfect" tendencies frustrating at first.  He's smarter now, too :)

I'm sure by now you're wondering, "Why on Earth is this post titled 'Butt Connectors'?!" As we were installing the trailer lights, we used butt connectors to connect the original trailer wiring to our more stylish LED trailer lights.  We wanted to get away from the traditional square trailer lights and opted for a sleeker look that uses less power.  Prior to this project, the thought that wires could be cut and spliced together with a $0.25 metal cylinder was unfathomable to me.  But, there I was, watching Kacey cut, connect, shorten and lengthen wire without blinking an eye.  It occurred to me that before the tiny house project, I approached life with a "if you cut a wire, there's no way to salvage it" attitude.  A year into our build, I'm learning that Kacey and I are connecting pieces of our lives together, trimming out the things and thoughts that no longer serve us, and working to lengthen this pretty special time in our lives.  If butt connectors could make our days just a little bit longer than they are, we'd buy them in bulk to preserve and cherish the home stretch of the biggest project either one of us has ever undertaken.  Thanks for supporting us along this journey.


Trailer lights.

Notice the trailer lights and the electrical box.

A good view of the hardware on the door here that 1) keeps the doors open and 2) prevents them from running into the porch lights and mailbox when they swing open.

The center view of the battery tray.  Hard to see, but batteries are connected (in series).

A bit easier to see the connections between batteries.

Now you can see the connection.  Connecting the + of one battery to the - of the next is called a series circuit.  It adds voltage -- for example, two 6-volt batteries connected in series results in a 12-volt circuit.  In our instance, we are connecting 8 6-volt batteries in series to provide us 48-volts to our inverter.  This is the ONLY way you would ever want to connect the + to the - .

Our installed shower head.  

Check our the sleek nozzle.

This little knob allows us to turn the water off right at the nozzle.  When we're working to conserve our on-board water during showers, this will come in very handy!

A shot of the pluming underneath.  On the right is the water tank.

This is the water pump box, the tube you see is the water out of the pump.

Another shot of the plumbing underneath the trailer.  

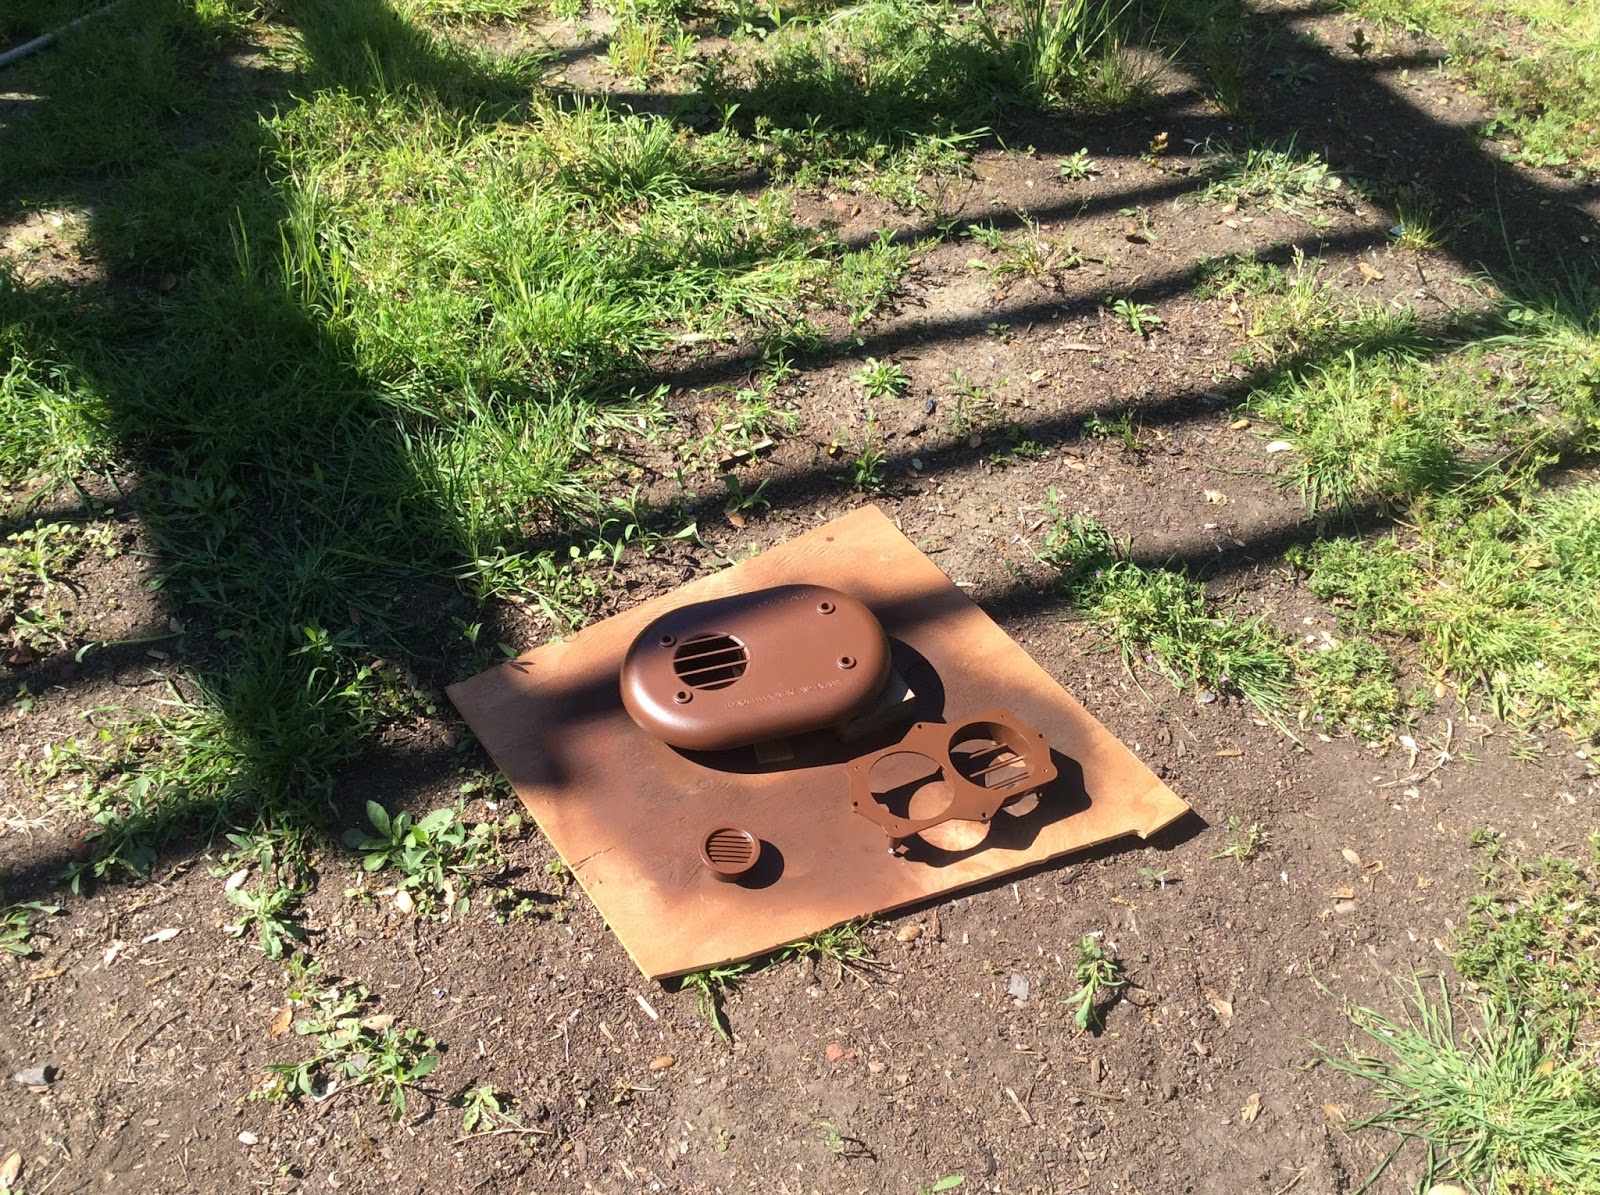
Kacey primed and painted the cover for the intake and exhaust for the hot water heater and bathroom exhaust fan vent.  Looks much more polished. 

The cover above will go here.  Kacey even pained the inside of the pipe on the left so that you didn't see white pipe inside of a painted vent.

The box that Kacey built around the water pump.  The bolts you see in the picture fasten directly to the trailer.

Another shot of the water pump.  The holes are for incoming (from the right) and outgoing water (to the left). There's also a serviceable particulate filter to keep dirt and sand out of the water pump. 

Installed inverter.

Zoomed-out view.  As you can see, it's installed just above the washer/dryer.

A profile view.  You can see it extends slightly past the 2 x 8, but not by much!

Exterior siding done except for a tiny sliver along the bottom.  You can still see a bit of white house wrap sticking out at the very bottom.

A close-up.

A view of the back, AND of the side that almost never gets pictured in the blog.  Proof that we're actually finishing the other side, too :)

I look at this photo with a smile.  You?

Sunday, February 21, 2016

Post 19 (Feb. 21)-What a Beautiful Shed!


Our house backs up to a bike path, and recently we've overheard many passersby comment on the house.  Most notably, someone recently said, "Wow, what a beautiful shed!" as she rode by on a mountain bike.  We chuckled.  People really must think that we are crazy.  And, they're probably right.

We've had a productive almost two months since I last wrote. Most visually exciting, certainly, is that most of the exterior siding is up! As you can see in the picture above, we also installed the porch lights and trimmed the little window above the door. The exterior siding has transformed the house in the most amazing way--it went from construction project to luxury mountain cabin in a series of weeks.

I'm sure the next thing you're thinking is, "WOW! You guys must be almost done!" Well... The exterior is mostly done, and now we are turning our attention inward.  Before we can do the interior walls we must finish the electrical (wiring's not been done yet) and get the insulation done.  So... we are closer than we've ever been before, but we're not there yet.

That's been my big lesson recently.  For months, I'd been so focused on getting the tiny house done that I became frustrated when things took a longer than I thought they should, and frustrated that this project has gone on for more than a year now.  That frustration seeped into other areas of my life, as lessons we must learn often do.  I'm not sure what shook me out of that frame of mind, but one Sunday, instead of rolling up my sleeves somewhat grumpily, I stepped outside into the February sun, marveled at the house we had built, smiled at Kacey, and thought, "What a phenomenal adventure we've undertaken together." I'm thankful that I've come around :)

Life has a funny way of keeping us in check--humbling us when we're feeling untouchable, supporting us in moments of freefall, or grounding us in moments of unsteadiness.  What a crazy gift it is, to be alive.

Here's the breakdown of what we've been up to:

  • We drilled holes and plumbed the wires for the A/C unit. This was fun! Fun in the, "we hadn't thought we'd be able to do this ourselves, but we did it!" way.  If it weren't for our neighbor and friend with a corded drill, we might be telling a very different story about this! 
  • We installed the toilet vent, ensuring that it is secured for travel, but still serviceable if necessary.
  • We got the siding up on the first level.  We're waiting to do the dormer siding until a few things are fixed with the roof. Barth Roofing did an amazing job, and are being very patient with our request to make a few adjustments.  We appreciate their commitment to out tiny house!
  • In the last blog post, I mentioned that we chose and paid for a solar system...it arrived!  I was surprised to see just how large solar panels are, and how heavy the batteries are!
  • We are nesting the battery bank under the trailer just as we did the water tank.  Kacey designed and built a "battery tray." A genius design that protects and insulates the batteries, seals them and allows for basic servicing.  He really is so inventive.
  • 2/3 Trim around the tiny window :)
  • We have LED lights for the house and LED strip lights that will cascade up the ceiling for ambient light. We purchased the RGBW version, meaning that we can choose which color we have.  Since the ceiling will be white, can you imagine how crazy it will look when the lights are colored?  The whole house will totally transform!
Up next:
  • Slight roof modification
  • Dormer exterior siding
  • Electrical wiring
  • Insulation (spray insulation for the walls to increase structural support, and sheep's wool on the ceiling to allow for venting)
  • Interior walls :)
Alright alright, I know you're only here for the pictures.  Thanks for tuning in!

The HVAC pipes--the white ones.  
Kacey bent the copper pipes to connect them to the A/C fan.  So skilled, he is.
Super excited about the siding!
In order for the siding to fit correctly around the outlet, we had to put some plywood the thickness of the furring strips around the box.   
Such attention to detail. 
Little by little...
The inverter (next to the stool for size comparison) is surprisingly heavy.  This will be installed inside the house in the wall next to the washing machine.
YAY!
This is the battery tray that Kacey designed.
The horizontal pieces of wood separate the batteries from one another.  The center hole allows for access to the batteries.
This is what it looks like when it's underneath the trailer.
Suspended with all thread rods.
The siding on the passenger side of the house. 
The porch lights, the electrical boxes, the siding.
We also installed magnetic doorstops to 1) prevent the doors from slamming into the porch lights and 2) keep the doors from slamming shut if it gets windy.
Welcome to our home!
The driver's side of the house.
We also installed a vent for the bathroom fan.
A close-up of the toilet vent.

The sun is rising on a tiny future!
Before the porch lights are installed.  The square blocks allow the porch lights to sit vertically.  If they'd been installed on the siding, they would have been tilted back because of the angle of the shiplap siding.

Saturday, January 2, 2016

Post 18 (Jan. 2)-Life is a Crowded Dance Floor

A side view of the trim around the dormer windows--at long last!
Life is a crowded dance floor.  You choose to walk on to the dance floor, slightly anxious, thinking, "What if the music isn't good?  What if my dance moves are laughable?  What if I bump into someone else and inadvertently start trouble?  What if I step out onto the dance floor, only to find that my friends haven't joined me and I'm all alone?"

Once you're on the dance floor and a song you like comes on, it's easy to dance.  The moves are natural and you might even find yourself singing along.  Often, without quite enough warning, the song changes and sometimes it's a song you've never heard before and don't like very much.  The moves are unnatural, you damn near have to count beats to dance on rhythm, and the joy of dance fades away.   In that moment, you can choose to walk off the dance floor and wait until a new beat resonates with you.  Or, you can work a little bit harder to keep up, look for cool moves around you, and hope that the song grows on you.  I've done both.

Inevitably, on a crowded dance floor, you'll lose your balance.  Your heels are tall, the floor is sticky, the dance isn't choreographed, and there are lots and lots of people.  If you're lucky, really really lucky, just as you start to lose your balance, someone will be there there to stand you back up on your own two feet.

On New Year's Eve, I really was on a crowded dance floor.  For the past 45 days (especially the last two weeks), my life felt a whole lot like a crowded dance floor.  I found myself anxious before making a big decision, heard news I didn't like and could have run from or run into the challenge, and lost (and found) my balance.  Here are the big accomplishments.

1. Chose (and paid for!!) solar system.  We figured out how much electricity we will need and worked with Wholesale Solar (shoutout to Alfred and Jeremy) to design a system that will allow us to be completely off-grid and have the ability to charge the batteries with a generator or with a grid connection.  Purchasing the solar system was my "Uh-oh, the DJ changed the song and I'm not sure I like it," moment.  Solar systems are expensive.  I mean, really really expensive.  I made the decision to step on to the metaphorical dance floor and purchase the system.  I was still feeling unbalanced when I got home and Kacey brought me back to Earth, reminding me that, "Yes, this is a big risk.  Yes, this tiny house if full of big lessons.  Yes, this is an adventure.  And yes, this is gonna be fun."  Life is a crowded dance floor, and I was so happy he was there to help me regain my balance.

2. Started electrical work. We are installing electrical boxes, purchasing LED strip lights, deciding where the switches will be, and putting more outlets in our 242 sq. ft. house than in our current full-size rental.  The first night Kacey and I went out to decide about switches, we came to almost immediate agreement.  Thank goodness we didn't have boxes out there with us that night because on the second night, we went back out there to confirm the previous' night's decisions and came to immediate agreement on switch locations that were ... completely different ... than the decisions we'd made earlier.  Repeat that at least two more times.  Now we are putting the boxes up.  And, still, changing our minds every now and then.

3. Relocation of water tank. Previously we thought that we'd locate a 55-gallon water tank underneath the kitchen counter.  We had this nagging worry that a faulty $1 fitting would allow 55 gallons of water to escape the tank and ruin the interior of the tiny house.  This was one challenge that we wanted to run away from rather than into.  Kacey came up with a brilliant solution!  Using Unistrut, we will suspend a wide, flat water tank underneath the trailer.  We have roughly 7 inches of unused vertical space on the underside of the trailer.  Now, we'll have 95 gallons :) Enough for 1 shower a week.  We really want to figure out how this Nebia shower head will fit in our tiny 32"x 32" shower.  It would mean we could have at least 4 showers a week, each!

4. What's on deck? Siding! With the electrical connections through the exterior walls getting installed, the siding will be going up. Just when we were beginning to like the house wrap/red contractors tape motif... :) Also on deck is insulation. As soon as the electrical is installed, the spray foam insulation will be going in the exterior walls and sheep's wool for the ceiling.

5. New friends because of tiny house.  We love when neighbors and people passing by on the bike path show interest, exclaim that they love the "little house" or ask fifty questions (the "What are you going to do about the toilet?" question being the most asked. One neighbor is a serious tiny house aficionado, as well as a contractor. He looks forward to bringing his own tiny house dream to fruition in the future, and in the meantime has been extremely helpful and friendly.  We are so happy to add friends and supporters to our circle.

We finished the trim around the dormer windows.  We had to wait until the roof was on so that the trim could lay over the flashing.
Side view of the trim.
Notice the electrical box in the lower right corner.   
The electrical box next to the outdoor speaker.  This box will provide electricity to the string of lights we'll put around the dormer loft. 
A close-up.
Check out this tiny little ceiling fan!  
Today we installed three boxes in the back room (the room with bathroom, shower stall, closet & laundry)
This is the LED light that will go in the box.
We will also have a fan in the middle of the back room.  Because the ceiling is the floor of the loft, we can't countersink the fan into the ceiling. 
Notice the fan sits level with the rafter.  We installed some shelves the tongue and groove can rest on so that is flush with the rafter when complete.  An added bonus is that we use the extra space as a much-needed way to have electrical wires run from one side of the house to the other.
More electrical boxes. 
In case you hadn't seen enough :) 
A mini electrical panel!  
The inside view.